Time Machine - Frequently Asked Questions
34. "Rotating" Time Machine backup disks
Time Machine - Frequently Asked Questions
34. "Rotating" Time Machine backup disks
Effective with Mountain Lion 10.8.x, Time Machine can automatically back up to two (or more) separate destinations, in "rotation." Each backup is completely separate and independent from all others. Backups are run hourly, but each available drive is backed-up to in turn.
Note that the first backup to each volume will be a full one; all others will be of everything that's changed since the previous backup to that particular destination.
These are "redundant" backups -- the same set of exclusions applies to each one. You cannot back up different things to different disks this way.
Some folks do this already, but prior to Mountain Lion, had to remember to make the switch manually, via the Select Disk button. See question #27 for details.
Note: this may not be the best strategy for redundant backups -- if there's a problem with Time Machine, your backups may not be as reliable as you think. It may be a bit safer to use Time Machine with one destination, and a different backup app with another. That way, if there's a problem with either app or destination, you'll still have the other one. See the green box in question #27 for some suggestions.
Here's how it works in the two most-common situations:
Rotating backups in the same location:
For example, you have a directly-connected external HD, but also want backups on a network drive, such as a Time Capsule, for safety. Time Machine will back up to each in turn, one per hour. So if there are 2 drives, each will be backed-up to every other hour.
If for some reason one of the disks isn't available when it's turn is due, TM will back up to the next available destination -- it won't skip doing a backup. That destination will get a backup every hour until the other becomes available again, then they'll alternate.
Rotating backups in different locations:
For example, you use your laptop at work and at home. At work there's a network drive; at home you have a Time Capsule. When you're at work, the network drive will be backed-up to hourly (since it's the only one available); when at home, the Time Capsule will be used hourly (ditto).
In both cases, if any disk is unavailable for about two weeks, Time Machine will send a warning message, but otherwise it will continue to back up to the available disk(s).
See below for setup and configuration instructions and details.
See the blue box below for info on viewing backups.
See the tan box below for info on restoring backups and other considerations.
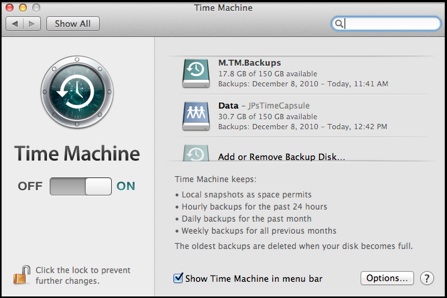
Note that, even if the disk already has backups on it, the first and last backups dates won't appear until after a backup has been completed.
The panel is scrollable (but without scroll bars), with an Add or Remove Backup Disk item at the bottom.
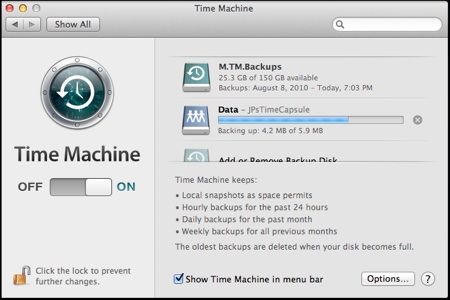
If a backup fails, a red "i" icon will be shown in the section for the drive in question.
Viewing Backups via the TM Browser ("Star Wars" display):
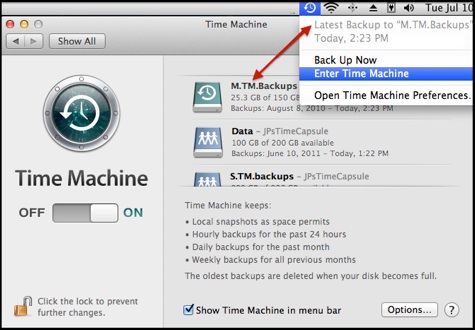
Click the Time Machine icon in your menubar (or the one in your Dock) and choose Enter Time Machine.
To see backups on other disks in the rotation, or disks not in the rotation at all, see below.
See FAQ #15A and #15 for details of the Time Machine browser (the "Star Wars") display.
Viewing "other" Backups:
Note: This option DOES NOT WORK on the first versions of Mountain Lion. If you're on 10.8 or 10.8.1, use Software Update from the Apple menu, or see Installing the Combo Update.
To see the backups on other disks, either:
•Hold down the Alt/Option key while selecting the Time Machine icon in your menubar -- Enter Time Machine changes to Browse Other Backup Disks...
•Or, control-click (right-click) the TM icon in your Dock), and select Browse Other Backup Disks...
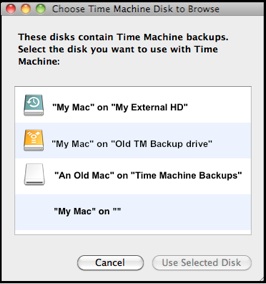
If the other backups are on a network, you may have to manually connect to them (and/or mount the sparse bundle they're in by double-clicking it in the Finder) first. Then they'll look like the 3rd sample. See FAQ #17 for details.
Note: the 4th item shown is a bug that occurs on some versions of Mountain Lion. It's a leftover from a network backup. Ignore it.
Local Snapshots (on laptops) do not appear on this display, but are shown in the Time Machine browser with any backup disk you select (with white "tick marks" in the timeline on the right), since they're actually on your internal HD, not the backup disk. Backups on the external disk are shown with purple "tick marks." See FAQ #30 for the gory details on Local Snapshots.
Restoring from Rotating Backups:
Remember that the various disks won't all have the same backup times, so if you want the most recent, or a particular time, check the dates on each.
As noted above, the Time Machine browser automatically shows the backups for the current or most recent destination, which will usually be the one you want to restore from. If not, select the desired set of backups as above.
Otherwise, restoring has not changed. See FAQ #15 for details.
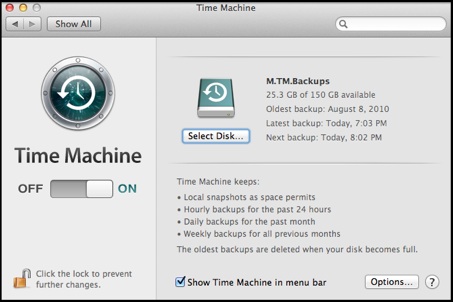
Setting-up rotating backups:
Set the first one up normally, via the TM Preferences window. It will look and operate just as in the past. Basically, click the Select Disk button and choose the desired location from the list that appears there. If in doubt, or there's a problem, see:
•To back up to an internal or directly-connected external disk: FAQ #21.
•To back up to a shared drive on another Mac: FAQ 22.
•To back up to a Time Capsule's internal HD or a USB drive connected to a Time Capsule: Using Time Machine with a Time Capsule.
•To back up to a USB drive connected to an Airport Extreme (not reliable and not supported by Apple): Using Time Machine with an Airport Extreme.
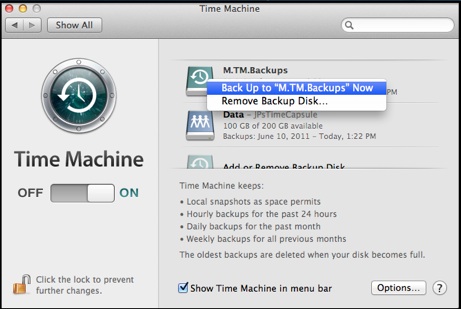
To remove or replace a disk:

Control-click (right-click) the icon for the desired disk on the Preferences Window, then select Remove Backup Disk. You'll get a confirmation prompt.
If you want to replace it, click Add a Backup Disk at the bottom of the scrollable panel and select the new disk.
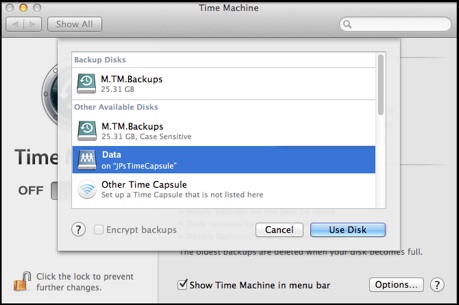
Select the one you want, and the Use Disk button will be enabled.
(If you select one in the Backup Disks section, the option will be Remove Disk.)
(Oddly, already-selected disks appear in both sections.)
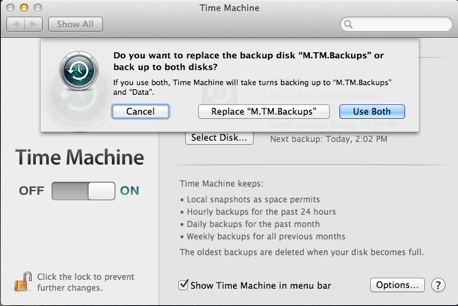
If you add more disks, you won't get this prompt again -- the disk selected will just be added to the "rotation."
Other considerations:
If you use drives of different sizes, that's not a problem. One may run out of room earlier than another, so Time Machine will begin deleting old backups from that destination earlier than the other(s). Thus one disk may have older backups than others, but that's not a problem. Remember, each set of backups is completely separate and independent.
If you're using multiple drives in the same physical location, and there's a problem with one that makes it "unavailable," you may not see error messages, as Time Machine will just back up to the other one. So check the Time Machine Preferences panel periodically, to be sure the right disks are getting backups at the right times.
To back up to a particular disk instead of the next one in the rotation: