Time Machine - Troubleshooting
A5b. How to Repair Time Machine Backups
on a Time Capsule
Time Machine - Troubleshooting
A5b. How to Repair Time Machine Backups
on a Time Capsule
First, connect to the Time Capsule via an Ethernet cable if at all possible; it will be 2-3 times faster than via wireless.
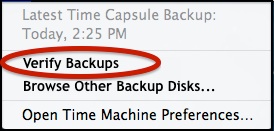
Effective with Mountain Lion 10.8.x, if you're using multiple backup drives, this will verify the current or most recent backup drive only. To verify a different one, either run (or start) a backup to the desired destination, or use the procedure below.
If not, or if that doesn't work, or doesn't solve the problem, use the following procedure:
If Repair Disk fails:
If Disk Utility says it can't repair the sparse bundle, look closely at the messages. If it repaired some things, but not everything, run it again (and again) until it either repairs everything or can't repair any more.
If Disk Utility can't repair the sparse bundle, it's possible a heavy-duty 3rd-party disk repair app, such as DiskWarrior, can. These are expensive (DiskWarrior is about $100), and probably a good investment for the future, but there's no guarantee it will work. You must be able to "mount" the disk image by double-clicking the sparse bundle for these apps to be able to see and repair it.
If you decide to do this, be sure to use only a version that's compatible with the version of OSX on your system. (If you're not sure what version of OSX you're using, see What Version of OSX do I have?)
One Last Option:
If you're comfortable with Terminal and UNIX, the procedure in this post might be worth a try: http://blog.jthon.com/?p=31 It was written several years ago, and may or may not work in your situation, especially on later versions of OSX.
If you're out of options:
You might be able to recover some of the data, but it’s "iffy" and expensive. See Data Recovery for the gory details.
Otherwise, your only option is to erase the backups and let Time Machine start over.
If there's nothing else on the Time Capsule, erase it, per #Q5 in Using Time Machine with a Time Capsule. But do select Zero Out Disk. That will take a long time, but if it fails, you know the TC's disk itself has failed. If it succeeds, the disk may be ok.
If there is other data on the Time Capsule, delete the sparse bundle via the Finder. That will take a long time, too. If it's extremely slow, you might be able to do it somewhat faster, per the blue box of #Q5 in Using Time Machine with a Time Capsule.
Repair Messages
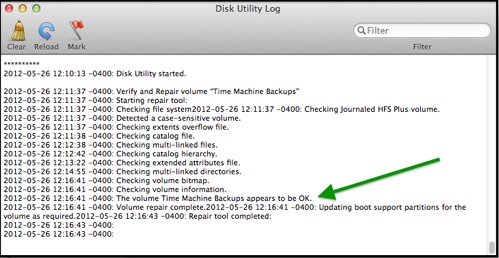
What you're looking for, of course, is the "appears to be ok" message. If you get error messages instead, see the pink box below.
Note that this log is kept on your Mac, so if you missed the messages, you can start Disk Utility again and go directly to them, without having to run Repair Disk again. Each task is separated by a row of asterisks.
Use the Disk Utility app, in your Applications/Utilities folder (or type Disk Utility into the Spotlight search box in your menubar).
Backups made over a network are stored in a container called a sparse bundle disk image.
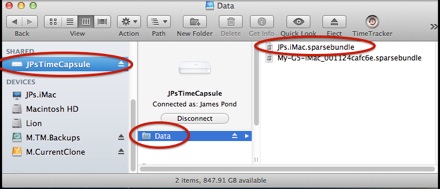
(Note: The .sparsebundle suffix isn't always displayed.)
If the server isn't shown, from a Finder menubar, select Preferences > Sidebar and make sure the Connected Servers box is checked.
If you're backing-up more than one Mac to the Time Capsule, there will be a separate sparse bundle for each Mac. Drag the one you want from the Finder window to the lower part of Disk Utility's sidebar. It may take a moment to appear.

If the Repair Disk button isn't enabled, and the "Time Machine Backups" disk image is shown below it, select the disk image instead.
Don't click the Verify Disk button first; if a problem is found, and you then click Repair Disk, the entire verification is repeated!
(If you get a message that the sparse image is in use, or can’t be unmounted, see section #C12.)