Time Machine - Troubleshooting
E9. Permissions problems restoring iPhoto Library
Time Machine - Troubleshooting
E9. Permissions problems restoring iPhoto Library
This is usually caused by problems with the permissions in your existing iPhoto library and/or the backups. It seems to be more common if you've upgraded and/or migrated from a previous version of OSX.
Create a new, empty iPhoto Library in the folder you want to restore to, then use Time Machine to do the restore:
1.Quit iPhoto.
2.Rename the existing iPhoto Library (to something like iPhoto Library original).
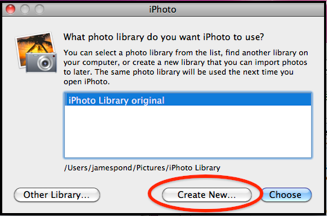
3.Hold down the Alt/Option key while starting iPhoto. You'll get this prompt:
4.Click Create New.
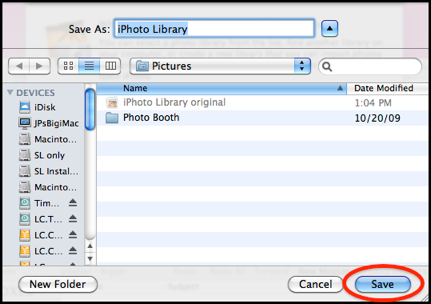
5.You'll get a prompt for the name and location of the new library:
6.Select the desired folder (your Pictures folder should be the default) and click Save. That will create a new, empty, iPhoto Library.
7.iPhoto will open in the new library (no photos, events, etc.)
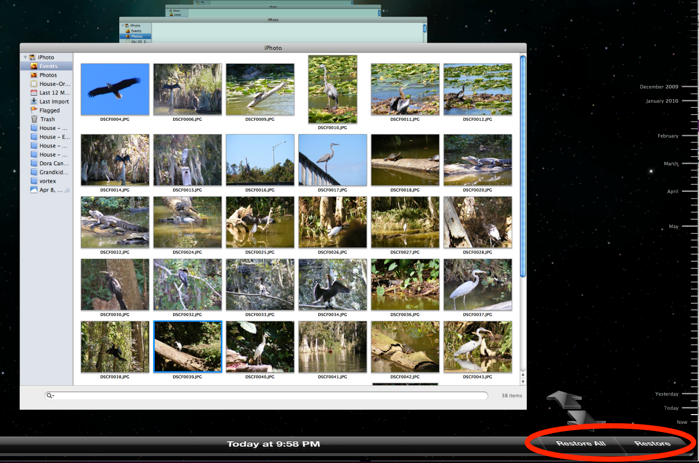
8.Now you need to Enter Time Machine and do the restore:
•If you're on Lion 10.7.x or later, with iPhoto '09 or later, click the Time Machine icon in your Dock, or select Enter Time Machine from the Time Machine Icon in your Menubar. Navigate to the desired backup as usual, via the Timeline on the right, or the "cascade" of Finder windows. Select the iPhoto Library and click the Restore button.
•If you're on earlier versions, click the Time Machine icon in your Dock, or select Enter Time Machine from the Time Machine Icon in your Menubar, or select File > Browse Backups from the menubar. Navigate to the desired backup as usual, via the Timeline on the right, or the "cascade" of iPhoto windows. Select the photo(s) you want to restore , and click the Restore button, or, to restore the entire iPhoto library, click Restore All.
Compress the backed-up iPhoto Library, move it to the proper location, and decompress it:
1.Quit iPhoto.
2.Via the Finder, examine your backups and locate the version of the iPhoto Library you want to restore. Note: be very careful not to change, move, or delete anything in your backups via the Finder, as that can corrupt them, perhaps beyond repair.
•If your backups were made directly to an internal or external HD, open it via the Finder. You'll see a display like the sample below.
•If your backups were made over a network, they're in a container called a sparse bundle. Double-click it via the Finder to mount the disk image inside it. Then double-click the disk image to open it. You'll see a display something like this sample (in List View):

At the top level is the Backups.backupdb folder.
Inside it is one folder for each Mac that was backed-up.
Inside that is one dated folder for each backup (circled in green).
Inside each of those is a complete duplicate of the file structure for each volume (disk/partition) that was backed-up ("Macintosh HD" in the sample).
In the Users folder is one folder for each User Account (circled in blue).
Inside that is the Pictures folder containing the iPhoto Library (circled in red). If you've moved it elsewhere, it will be in the corresponding place.
3.Control-click (right-click) the iPhoto Library and select Compress iPhoto Library. You'll get a progress window while OSX creates an iPhoto Library.zip file, in the backup. Very carefully, copy (drag) it to the proper location on your internal HD (the Pictures folder in your home folder, unless you've moved it).
4.Control-click (right-click) the copied file and select Open with, and select Archive Utility.
5.The file will be unzipped to either iPhoto Library or, if that already exists, iPhoto Library 2, in the same folder.
6.Double-click the new iPhoto Library to open it with iPhoto.
Start with the procedure on the next page, in the tan, yellow, or blue boxes, as appropriate. If neither of them works, try the ones below.
Even if one of these workarounds allows the restore, it probably isn't a permanent fix -- if you ever need to restore again, you'll likely have the same problem again. You may be able to fix the problem for future backups via the procedure in item 10 of the tan box on the next page.