Apple Tips: Using Disk Utility
9. Checking the S.M.A.R.T. status
Apple Tips: Using Disk Utility
9. Checking the S.M.A.R.T. status
Some disk drives include special S.M.A.R.T. (Self-Monitoring Analysis and Reporting Technology) hardware that may indicate the health of the physical drive. See http://en.wikipedia.org/wiki/S.M.A.R.T. for details.
This is different from the status of the file system on the disk, which you can verify or repair via Disk Utility. See Verify or Repair Disk for details.
These drives report detailed results of a number of tests (read errors, spin-up time, bad sectors, etc.). Various 3rd-party utilities will scan those diagnostics and display the results. One such is Smart Utility for MAC OS X.
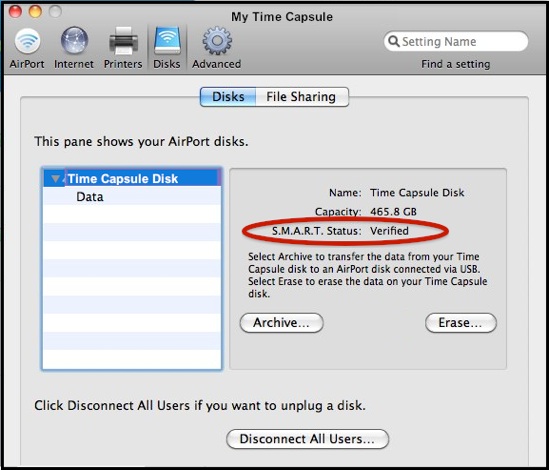
The S.M.A.R.T. status reported via Disk Utility (or Airport Utility for a Time Capsule's internal HD) will be one of the following:
•Verified - the disk is probably healthy.
•Not Supported - you'll see this on many external HDs.
•About to Fail - the disk has failed some of the tests, likely indicating a failure is likely. It would be prudent to be sure the disk is well backed-up; many people replace such a disk immediately.
Checking the S.M.A.R.T. status on an internal HD
Select the top line for the drive in question in Disk Utility's sidebar. The S.M.A.R.T. status will appear at the bottom:

Checking the S.M.A.R.T. status on a Time Capsule's internal HD
If you have Airport Utility 6.0.x, you’ll need the old version: Airport Utility 5.6 (you can have both at once).
If you're on Mountain Lion, version 5.6 will download but won’t install. You can use the Pacifist app to extract it from the download.
Go to the Disks panel (select Manual Setup, then Disks in the toolbar).
The S.M.A.R.T. status will appear as shown:
